Articles > How to Set Up Dynamic DNS on Your Router
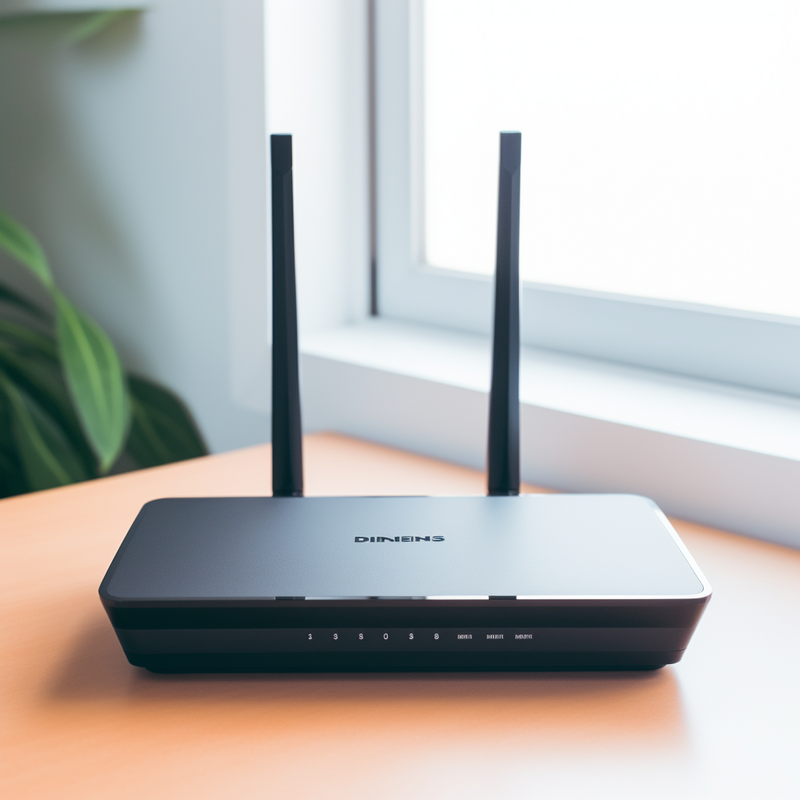
The Netgear R6300 manual is a comprehensive guide available in English that focuses on routers. This manual serves as a go-to resource for individuals seeking detailed information about the Netgear R6300.
In this section, we aim to provide a comprehensive introduction to the Netgear R6300 while addressing any initial questions or concerns users may have. Whether you are considering purchasing this router or have recently acquired one, this section will offer an overview of its features and functions.
The Netgear R6300 is known for its exceptional wireless performance, offering advanced connectivity and high-speed internet access. It delivers blazing-fast WiFi speeds, enabling seamless streaming, gaming, or large file transfers. The router supports dual-band WiFi, making it suitable for both regular internet browsing and demanding tasks.
Furthermore, the Netgear R6300 comes equipped with advanced security features, safeguarding your network against potential threats. Its sleek design ensures that the router blends well with any home or office environment.
Throughout this manual, we will dive deeper into the various aspects of the Netgear R6300, including installation, configuration, troubleshooting, and advanced settings. By providing clear instructions and addressing common concerns, we aim to empower users to effectively utilize this powerful router and optimize their internet experience.
Dynamic Domain Name System (DDNS) is a technology that allows users to access their network remotely by assigning a domain name to their dynamically changing IP address. With the increasing globalization and interconnectedness of the world, DDNS plays a crucial role in providing reliable connectivity, bridging the geographical distances between individuals and resources.
Traditionally, networks were accessed using static IP addresses, which remain the same. However, this poses a challenge as most residential internet connections have dynamic IP addresses, which change periodically. DDNS overcomes this challenge by automatically updating the IP address associated with the domain name, ensuring that users can always access their network remotely, regardless of the IP address changes.
The importance of DDNS lies in its ability to provide convenient and reliable connectivity. By assigning a domain name to the network, users can easily remember and access it from anywhere in the world. Whether it's accessing files, controlling devices, or monitoring security systems, DDNS ensures seamless connectivity, eliminating the need to remember complex IP addresses.
Moreover, in today's global village, where individuals travel frequently or work across different locations, DDNS enables them to access and manage their networks even when away from the physical location. It eliminates the barriers of distance and time, fostering collaboration, productivity, and efficient resource utilization.
In conclusion, DDNS is a vital technology that enables individuals to access their networks remotely. Its significance lies in providing reliable and convenient connectivity, ensuring seamless access to resources in our increasingly interconnected world.
Introduction:
Setting up Dynamic Domain Name System (DDNS) on your Netgear router offers various benefits that can enhance your internet experience. DDNS helps you access your home network devices remotely, even if their IP addresses change frequently. It provides a fixed and easily memorable domain name, eliminating the need to remember complex IP addresses. Additionally, it enables you to set up personalized email addresses, host your own website, and enhances security by allowing you to monitor network activity and customize access rules. With DDNS on your Netgear router, you can enjoy seamless remote access, improved convenience, and a heightened level of control over your home network.
Benefits of setting up DDNS on your Netgear router:
1. Remote access: DDNS allows you to access your home network devices, such as security cameras, file servers, or media devices, from anywhere in the world. You can conveniently monitor your premises, retrieve files, or stream media without the need for complicated configurations.
2. Simplified access: With DDNS, you can assign a domain name to your home network instead of relying on ever-changing IP addresses. This simplifies access to your devices, as you only need to remember a single domain name instead of a series of numerical addresses.
3. Personalized email addresses: By setting up DDNS on your Netgear router, you can create personalized email addresses using your domain name. This gives your network a professional touch and enhances your online presence.
4. Host your own website: DDNS enables you to host your own website using your chosen domain name. This provides you with the ability to customize your online presence and showcase your content or services to the world.
5. Enhanced security: DDNS allows you to monitor network activity and customize access rules, thereby bolstering your network's security. You can establish specific permissions for different devices or users and stay informed about any unauthorized access attempts.
By harnessing the benefits of DDNS on your Netgear router, you can enjoy seamless remote access, simplified connectivity, personalized digital identity, the ability to host your own website, and an increased level of security for your home network.
Dynamic DNS (DDNS) plays a crucial role in the context of video surveillance over a network using ADSL. Its purpose is to enable consistent access to surveillance systems by allowing users to bypass the challenges posed by dynamic IP addresses.
ADSL (Asymmetric Digital Subscriber Line) connections are commonly utilized for video surveillance systems due to their ability to offer relatively high bandwidth and stable connections. However, ADSL connections are usually assigned dynamic IP addresses by internet service providers (ISPs). Dynamic IP addresses change periodically, making it difficult to consistently access surveillance systems, especially when connecting remotely.
This is where DDNS becomes essential. DDNS provides a solution by allowing users to assign a fixed domain name to their ADSL connection, regardless of the dynamic IP address associated with it. By registering with a DDNS provider and configuring the surveillance system to update the provider with any IP address changes, users can access their surveillance systems using a static domain name.
The importance of DDNS lies in maintaining consistent access to video surveillance systems. Without a static domain name, users would have to constantly track and update their changing dynamic IP addresses, making remote access cumbersome and unreliable. DDNS simplifies the process by offering a reliable means to access surveillance systems, regardless of changes in IP addresses.
In summary, DDNS is crucial for video surveillance over an ADSL network as it allows users to bypass the challenges posed by dynamic IP addresses. By providing a static domain name, DDNS ensures consistent access to surveillance systems, making remote access easier, more reliable, and effective.
DDNS, which stands for Dynamic DNS, is a technology that allows users with dynamic IP addresses, such as those provided by ADSL (Asymmetric Digital Subscriber Line), to access their surveillance systems remotely. In a typical remote access configuration, users connect to their surveillance systems over the internet. However, with dynamic IP addresses, the IP address assigned to the user's network changes periodically, making it difficult to establish a consistent connection.
This is where DDNS comes into play. It is a service that maps a domain name to a user's dynamic IP address. Instead of typing in the changing IP address to access the surveillance system, users can use a domain name that remains consistent.
The relevance of DDNS in remote access configuration is paramount for users relying on surveillance systems. By updating the domain name whenever the IP address changes, DDNS ensures uninterrupted access to the surveillance system from any location. Without DDNS, users would constantly need to keep track of IP address changes and manually update any references to the IP address, which is cumbersome and prone to errors.
In conclusion, DDNS is essential for remote access configuration when dealing with dynamic IP addresses. Its ability to map a domain name to a changing IP address ensures seamless and convenient remote access to surveillance systems.
Introduction:
Dynamic DNS (DDNS) is a service that allows users to assign a fixed domain name to a changing IP address. In a typical scenario, when a device, such as a computer or router, connects to the internet, it is assigned a temporary IP address by the internet service provider (ISP) to identify it on the network. However, this address can change periodically, creating a challenge for users who want a constant, easy-to-remember domain name for their device or network. DDNS provides a solution by automatically updating the IP address associated with a domain name whenever it changes, ensuring that users can access their devices or networks reliably and conveniently. This article will delve into the inner workings of DDNS, explaining the processes and technologies behind its functionality.
When it comes to setting up video surveillance through ADSL with dynamic IP addresses, choosing a reliable DDNS provider becomes crucial in ensuring uninterrupted access to your surveillance system. With the increasing number of users opting for ADSL for video surveillance, it is essential to select a DDNS service that meets your specific needs.
First and foremost, consider the reputation and reliability of the DDNS provider. Look for providers with a track record of delivering consistent and stable services. Reading customer reviews and ratings can provide valuable insights into the provider's performance and reliability.
It is important to choose a DDNS provider that supports dynamic IP addresses. ADSL connections often come with dynamic IP addresses that change periodically. A reliable DDNS service will automatically update your IP address, allowing you to easily access your surveillance system remotely.
Additionally, consider the ease of setup and configuration. Look for providers that offer user-friendly interfaces and clear instructions to simplify the installation process. This will ensure that even those without extensive technical knowledge can easily set up and manage their video surveillance system.
Lastly, take into account the technical support offered by the DDNS provider. A reliable customer support system can be invaluable, especially when encountering technical issues or difficulties in configuring the service. Prompt and knowledgeable assistance ensures minimal downtime and uninterrupted video surveillance.
In conclusion, choosing the right DDNS provider for video surveillance through ADSL with dynamic IP addresses is crucial. Consider reputation, support for dynamic IP addresses, ease of setup, and technical support when selecting a reliable provider. By doing so, you can ensure a seamless and uninterrupted video surveillance experience.
There are several popular DDNS (Dynamic Domain Name System) providers that are compatible with Netgear routers. These providers allow you to assign a static domain name to your dynamic IP address, making it easier to access your home network remotely.
One popular DDNS provider that is compatible with Netgear routers is No-IP. No-IP offers a free and paid service that allows you to create a custom domain name and update your IP address automatically. It is compatible with most Netgear routers and can be easily set up through the router's interface.
Another popular DDNS provider for Netgear routers is DynDNS. DynDNS also offers a free and paid service that provides dynamic DNS hosting. It is compatible with most Netgear routers and can be set up by entering your DynDNS account information into the router's settings.
Finally, DuckDNS is another popular DDNS provider that is compatible with Netgear routers. It is a free service that allows you to create a subdomain and update your IP address automatically. To use DuckDNS with a Netgear router, you need to configure the Dynamic DNS settings in the router's dashboard with your DuckDNS account details.
When choosing a DDNS provider for your Netgear router, it is important to ensure compatibility. Check if the provider is supported by your specific Netgear model, as some older models may have limited compatibility. Additionally, be aware of any specific features or requirements of the DDNS provider, such as the need to create an account or update settings regularly.
Introduction:
When selecting a DDNS (Dynamic Domain Name System) provider, there are several factors that need to be carefully considered. DDNS allows users to associate their dynamic IP addresses with a domain name, providing a way for remote access to devices or services that are constantly changing their IP addresses. To ensure a reliable and efficient DDNS service, it is essential to evaluate factors such as the provider's compatibility, reliability, security, ease of use, customer support, and cost-effectiveness. By considering these factors, individuals and businesses can make an informed decision and choose a DDNS provider that best fits their needs and requirements.
Creating an account with a Dynamic Domain Name System (DDNS) provider is a straightforward process that allows users to access their devices remotely using a domain name instead of a changing IP address. To get started, it is essential to access an internet browser and ensure it is up to date, with cleared history and cache.
Once the browser is ready, search for a reliable DDNS provider and navigate to their website. Locate the option to create an account, usually found on the homepage or in the top menu. Click on this option, and a registration form will appear.
Fill out the registration form with accurate details, including a valid email address, desired username, and password. It is crucial to enter the correct IP address associated with the device that requires remote access. This IP address can be found by logging into the Netgear router.
To log into the Netgear router, enter the router's IP address in the browser's address bar. Common mistakes to avoid at this stage include entering incorrect IP addresses or mistyping them. Once successfully logged in, locate the setting related to DDNS in the router's menu.
After ensuring all necessary information is correctly entered, the DDNS provider will generate a domain name associated with the user's IP address. Make note of this domain name, as it will be used to remotely access the device.
In summary, creating an account with a DDNS provider involves accessing an internet browser, ensuring it is updated, entering the correct IP address, logging into the Netgear router, and avoiding common mistakes throughout the process. Following these steps will enable remote access to devices using a domain name instead of an ever-changing IP address.
Dynamic Domain Name System (DDNS) is a service that allows users to associate a domain name with a dynamic IP address, ensuring that their website or network is always accessible. Creating an account with a DDNS provider is a straightforward process that involves selecting a provider, creating an account, obtaining a hostname, and configuring the router settings.
1. Select a DDNS provider: Research and choose a reliable DDNS provider that suits your needs. Popular providers include No-IP, DynDNS, and DuckDNS.
2. Visit the provider's website: Go to the chosen DDNS provider's website and locate the "Sign Up" or "Create Account" option.
3. Create an account: Provide the required details, such as username, email address, and password. Some providers may require additional information for account verification purposes.
4. Verify the account: Check your email for a verification link or code sent by the DDNS provider. Click on the link or enter the code to verify your account.
5. Obtain a hostname: Once your account is verified, log in to the provider's website and navigate to the "Dynamic DNS" or "Hostname" section. Create a unique hostname for your network or website.
6. Configure router settings: Access your router's settings by typing its IP address in a web browser. Locate the "Dynamic DNS" or "DDNS" settings and enter the hostname, username, and password provided by the DDNS provider.
7. Save the settings: After entering the required information, save the router settings, and restart the router. The DDNS provider will now update the dynamic IP address associated with your hostname, allowing easy access to your network or website.
By following these steps, you can successfully create an account with a DDNS provider and ensure uninterrupted access to your network or website.
Introduction: Verifying your email and activating your account
Before delving into the world of online platforms, it is imperative for users to verify their email and activate their accounts. Verifying your email establishes the authenticity of your email address, ensuring a secure and reliable way to receive important notifications, updates, and even reset your password if needed. By activating your account, you are validating your identity as a user, granting access to personalized features, and enabling seamless navigation within the platform. In this brief guide, we will explore the importance of email verification and account activation, as well as how to successfully complete these essential steps.
To configure your Netgear router for DDNS, start by accessing the login window. Type the IP address of your router into the address bar of your web browser. The default IP address for Netgear routers is usually 192.168.1.1 or 192.168.0.1.
Once the login window appears, enter the login credentials. The default username is "admin" and the default password is "password". Be careful to avoid typing mistakes and double-check that you haven't accidentally enabled the CAPS LOCK key.
After successfully logging in, locate the Advanced Setup or Advanced tab in the router settings. Look for an option related to Dynamic DNS or DDNS. This is where you will configure the DDNS settings. Some Netgear routers may have this feature under the Advanced Setup > Dynamic DNS category.
Click on the DDNS option and select the DDNS service provider you want to use. Popular options include No-IP, DynDNS, and 3322.org. Register an account with your chosen DDNS provider if you haven't already done so.
Enter the required information, such as your DDNS provider account username, password, and the hostname you want to associate with your router's IP address. Save the settings and apply the changes.
Once configured, your Netgear router will automatically update your DDNS provider with your router's current IP address. This allows you to access your home network remotely using the custom hostname you configured.
Remember to periodically check and ensure that the DDNS service is working correctly. Adjust the settings as needed if you experience any issues.
To access the web interface of a Linksys router, you need to follow a few simple steps.
First, open a web browser on your computer. It can be any browser like Google Chrome, Mozilla Firefox, or Internet Explorer.
Next, you will need to enter the web address "www.routerlogin.net" or "www.routerlogin.com" into the address bar of the browser.
Once you hit enter, you will be directed to the web-based setup page of your Linksys router.
On this page, you may be required to enter the default username and password. For most Linksys routers, the default username is "admin" and the default password is "password".
After entering the correct username and password, you will gain access to the router's web interface.
From here, you can configure various settings like Wi-Fi network name and password, firmware updates, firewall settings, and more.
Remember to always change the default username and password for security purposes after accessing the router's web interface.
With these easy steps, you can conveniently access the web interface of your Linksys router using any web browser and make necessary changes to your router's settings.
To navigate to the Dynamic DNS settings on the TP-Link router, follow the steps below:
1. Open a web browser and type in the IP address of your TP-Link router. Usually, it is "192.168.0.1" or "192.168.1.1". Press Enter.
2. Enter your router's username and password to log in. If you haven't set them before, check the router's manual or use the defaults (typically "admin" for both).
3. Once logged in, you will be directed to the router's web management interface. Look for a tab or menu option called "Advanced" or "Advanced Settings". Click on it to expand the menu.
4. In the expanded menu, locate and click on the "Dynamic DNS" or "DDNS" option. This will take you to the Dynamic DNS settings page.
5. On the Dynamic DNS settings page, you will find fields to configure the necessary information for the Dynamic DNS service. Enter the required details such as the DDNS provider, account information, and domain name.
6. Once you have filled in the required fields, click the "Save" or "Apply" button to save your settings.
Troubleshooting tips:
- If the IP address mentioned in step 1 doesn't load the router's configuration page, try using a different IP address like "192.168.1.0" or "192.168.0.0".
- Ensure you are using the correct username and password. If you can't remember them, reset the router to its factory default settings and try again.
- If you are unable to find the Dynamic DNS settings, consult the router's manual or TP-Link's support documentation for specific instructions and if the feature is supported by your router model.
 Author: Sebby Says